When to Plant Spring and Summer-Blooming Bulbs
Bulbs are the ultimate low-maintenance gardening hack.
There is a rich variety of colors, shapes, and bloom windows with bulbs, and you can find types that are hardy in cold climates as well as great performers in hot summers. Once you plant them, they require very little from you besides water and an occasional dose of fertilizer.
In this article we’ll talk about how and when to plant spring and summer-blooming bulbs for continuous, low-maintenance color in your garden.
What’s the Difference Between Bulbs?
Spring-Blooming
- Tulips
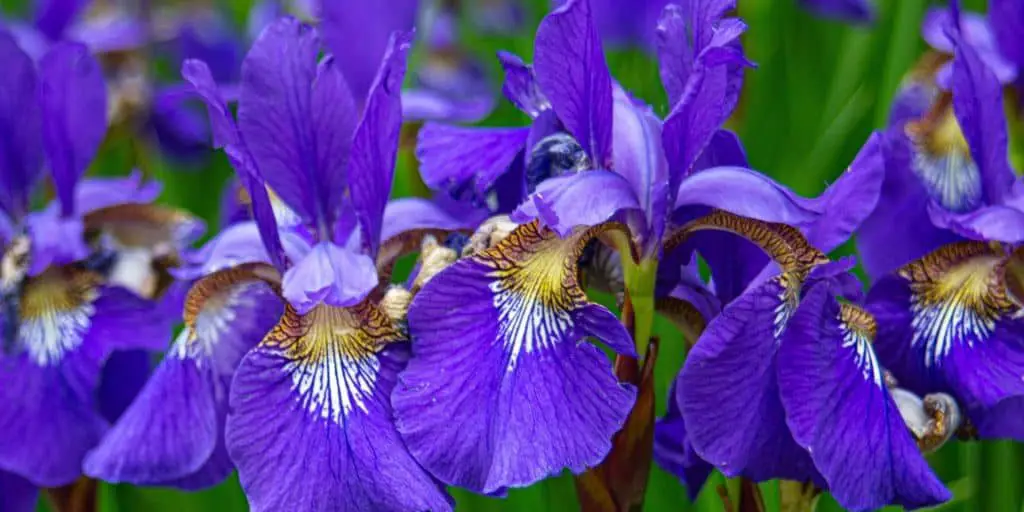
- Irises
- Daffodils
- Hyacinth
- Allium
- Crocus
These bulbs need a period of cold temperatures to break them out of dormancy, which means they are the first bulbs to bloom in spring.
In cold climates such as Zones 4-7, you can plant spring-flowering bulbs six to eight weeks before your first fall frost, when nighttimes temps are in the 40-50 degree Fahrenheit range. Cold zones should plant in September-October; slightly less cold zones should plant October-November. If you purchase the bulbs in summer, store them in the fridge until things cool down.
In warmer climates like Zones 8 and up, you’ll need to dig these bulbs up at the end of summer and store them in a refrigerator or freezer for at least six weeks (and sometimes as long as ten, depending on the bulb) to mimic cold winter conditions before planting again when the soil outside cools off in December or January.
Summer-Blooming
- Asiatic lily
- Begonia
- Caladium
- Calla lily
- Canna lily
- Crocosmia (hardy to Zone 4)
- Dahlia (bloom in fall)
- Elephant Ear
- Gladiolus
- Iris (hardy to Zone 3)
- Peacock orchid
- Pineapple lily
- Rain lily
Summer-blooming bulbs often produce the most spectacular flowers and foliage, as they are native mostly to the tropics, from whence all the showiest flowers hail. Plant these in mid- to late spring for abundant summer blooms.
These are typically annuals in colder climes (unless otherwise noted), so some gardeners will need to dig up the bulbs at the end of the summer and store in a cool–but not cold!–and dry place through the winter.
How to Plant Bulbs
Choose a Location
Determine whether the bulbs you want to plant need full sun, or some shade in the afternoon. Some summer-blooming bulbs perform better when sheltered from the intense afternoon sun of hot climates.
Then, make sure that your soil is prepped. Bulbs need good drainage and medium levels of organic matter, so add some soil amendment such as Bumper Crop.
To test the drainage, dig a hole about eight inches deep and fill it with water. If the water soaks into the earth within a couple of hours, no worries; but if you come back hours later and find standing water, use more soil amendment plus a lightener such as perlite, a humate-based conditioner, or even a few shovelfuls of woodchips to break up the dense soil texture.
Plan Your Layout
Get the most out of your bulbs–spend some time thinking about where and when you want them to bloom.
Plant in bunches for a punchy visual impact. This also makes bulbs easier to fertilize and, eventually, divide. However, make sure that plants with taller foliage and/or blooms go behind the visual line of shorter ones.
Bulbs are great in containers– just plant them a few inches closer together than you would if they were in the ground.
Decide if you want spring and summer-blooming bulbs to be intermixed or kept separate. Some gardeners plant their bulbs so that the same area will have a wave of spring blooms, followed by a wave (or several) of summer blooms. Others prefer to have spring-blooming bulbs concentrated in one part of the garden, and summer-blooming ones in another.
Create a color palette…or go for a color-crazy mix! Bulbs like crocosmia and calla lily have matching shades of vivid red, while a yellow-and-white daffodil could be pleasantly succeeded by a yellow-and-white iris or lily. You can select bulbs of differing but complementary colors, or just the ones you like best. But think about what arrangement of heights, bloom windows, and colors will look best in the space that you have.
Dig Some Holes
Planting depth is very important for bulbs. Too shallow, and the roots and new growth may freeze in cold early-season temperatures; too deep, and the foliage and flower stalks will never be able to reach teh surface.
The rule of thumb is to plant the bulb 2-3 times as deep as the bulb is tall. However, if your bulb came with a package, refer to it to find planting depth. The exception to this is iris rhizomes, which like to be relatively shallow and to have their “shoulders” exposed to the air.
Pointy End Up
Place the bulb in the hole with the roots down and the pointy end up. If no end looks pointy, plant it on its side so that the green material can go up and the roots can go down.
Re-fill the hole with soil, and add a thin layer of mulch on top. You can also work a special bulb fertilizer into the top couple inches of soil.
When to Cut Back Bulbs
Cut back each flower stem after the flower has finished blooming–or just before the bud breaks, if you want to bring it inside in a bouquet.
For bulb foliage, wait to cut it back until the leaves have turned yellow and gone to the ground. You can even leave the foliage until early spring of the next season, as they often provide valuable cover for overwintering beneficial insects.
How to Dig Up Bulbs for Storage
If you live in a cold area and want to store your tender summer bloomers over the winter, here’s the protocol for digging them up and keeping them safely:
- Cut foliage back to just above the soil line.
- Use a hand trowel, digging fork, or perennial shovel to loosen the soil around the bulb.
- Use your tool to lever the bulb out of the soil, and shake off as much dirt as possible. Do not wash it off–water at this point can introduce bacteria, fungus, or mold during storage.
- Spread the bulbs out in a single layer on a flat worksurface somewhere cool, shady, dry, and with good airflow–such as a garage. You can use an electric fan to help air circulate and the bulbs dry down a bit.
- After a week or so, inspect the bulbs and discard any that are soft or mushy. Store the good bulbs in a paper or mesh bag, and place the bag in a garage or basement where the temperature reamins between 50-60 degrees.
- Check back throughout the winter for mold or rot, and remove any bulbs that have it so that they don’t spread it to the others.
What Are Good Companion Plants For Bulbs?
You can add other annuals and perennials in the beds where your bulbs are, both to fill space and to provide even more color and contrast to your garden. Here are a few of our favorites:
- Alyssum
- Coral bells/Heuchera
- Creeping thyme
- Creeping jenny
- Cranesbill
- Creeping potentilla
- Daisy
- Dianthus
- Hellebore
- Hosta
- Sedum
- Snapdragon
