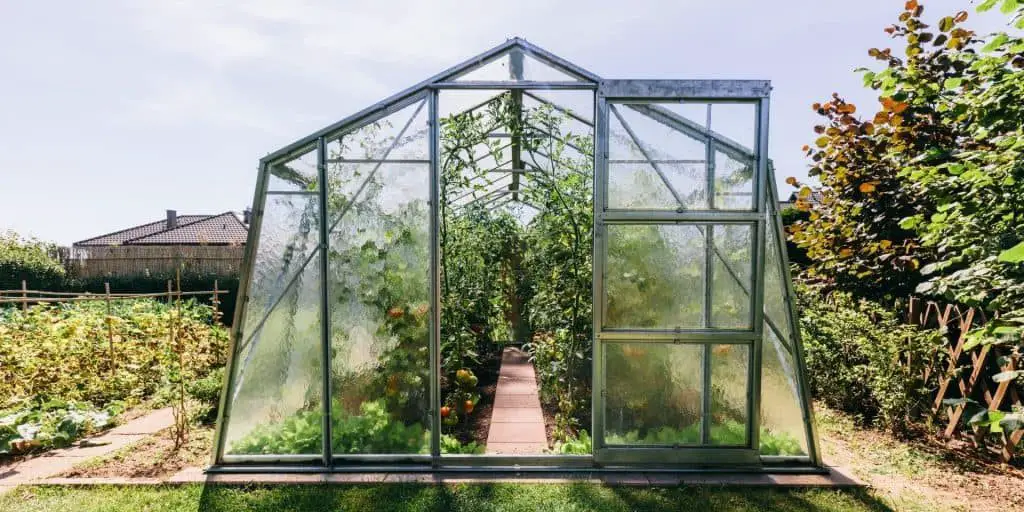
How to Grow Food in a Backyard Greenhouse
Do you have a greenhouse? Do you know how to make it as productive as possible with just a few tweaks?
This article will focus primarily on how to increase productivity in passive or unheated greenhouses, since this is what most home gardeners (like you!) have to work with. However, most of these tips and tricks are also applicable to heated greenhouses with a little adjustment.
So read on to find out how you can make a green oasis of production in the dead of winter!
Point it towards the sun
The sun rises in the east and sets in the west, but because the Earth’s axis is tilted, it also moves across the southern sky (if you live in the Northern Hemisphere) or the northern sky (if you live in the Southern Hemisphere).
To get the best light and thus the most solar heating in your greenhouse, orient its short sides towards the east and west, and its long sides towards the north and south.
Insulate the northern (or southern) side
In whichever direction the sun does not travel across, that side of the greenhouse will lose the most heat.
Add one or more extra layers of insulation on that side to help keep that heat trapped inside the structure!
Create easily accessible garden beds
Keep walkways in mind. Never make a bed so wide that it becomes difficult for you to work with soil or harvest.
Many people’s first instinct is to place the garden beds around the outside of the greenhouse, with a walkway in the middle. But reversing this also makes a lot of sense too!
In cold weather, the coldest areas in the greenhouse are those that are right next to the walls. Your vegetables will be better protected from frost when they are closer to the center of the space.
Another concern is the lumber foundations that most greenhouses feature. Even though this wood is usually treated, it will last longer if it stays as dry as possible. When you water plants that are right next to the wood, it will inevitably get wet and start to decay sooner than if you moved the plants (and their water) away from it.
Finally, you want your garden beds to be easy to harvest from. When each of your beds has a walkway on two or more sides, it is much easier to reach almost any part of that space, which means that you can harvest your vegetables without straining.
Don’t over-fertilize or over-water
Greenhouses protect the soil inside of them from the leaching, nutrient loss, and evaporation that outdoor soils experience through rain and wind exposure.
If you over-fertilize and/or over-water, your greenhouse garden beds will end up with nutrient imbalances that will burn plants and hinder their growth, and will be so waterlogged that no oxygen can travel through the soil to the roots.
Adjust your fertilization and water application accordingly:
Use slightly less than the full dosage of fertilizer whenever you apply it, and go longer between applications than the standard instructions.
If your plants start to flag in between fertilizations, use earthworm juice or liquid fish emulsion as a gentle but effective nutrient supplement. These won’t build up in the soil the way most other fertilizers will.
Once your plants are established and past the seedling stage, let the first one or two inches of soil dry out before you water. It’s better to water deeply at a lower frequency than it is to water less more often.
For year-round growing in a passive greenhouse, add another layer of protection
Frost cloth
We’ve talked about frost in our Complete Guide to Fall Planting, but it is also a useful tool when it comes to gardening in an unheated or passive greenhouse.
Row cover or frost cloth is a lightweight material that you can drape over plants or stretch over hoops along your garden bed to create a mini greenhouse effect, and protect plants from light to medium frosts.
A passive greenhouse usually keeps nighttime temperatures about ten degrees Fahrenheit warmer than the outside. When you use frost cloth in the greenhouse, you add another five to seven degrees of protection. Fifteen degrees can be the difference between a light, survivable frost, and a killing one!
Heat retention through water barrels
Water releases heat more slowly than soil or air, and you can use this trick of physics to heat even a passive greenhouse.
Black water barrels like this one inside a greenhouse absorb heat from the sun throughout the day, then slowly release that heat throughout the night, adding another few degrees to the greenhouse temperature.
You can also get this effect in a smaller greenhouse by with black five-gallon buckets, with gallon water bottles painted black, or even with tinted glass bottles (like wine bottles) placed along the north wall.
Dark colored mulch
Dark colored mulch or top dressing will absorb more heat from the sun than a light colored mulch will. It’s not as effective on its own as it is when it is combined with other heat-retention measures in this article, but every little bit helps!
Considerations for summer
All the things that keep the greenhouse warm in winter can become a liability when the hot temperatures of summer come. So any greenhouse grower needs to make responsive seasonal adjustments:
Increase airflow by installing a screen door on one end of the greenhouse, and one or more small screened windows on the other. Open both of these during the day to create a cooling crossbreeze. There are special greenhouse windows that have fans installed to actively move air through the space.
Remove any black water buckets or barrels. Store them in a dark indoor location, like a garage or barn, instead of outside to increase their lifespan.
Switch to a light-colored mulch with plenty of breathability, such as a thin layer of straw.
Shade cloth is specially made to go over greenhouses and cut down the amount of sun that reaches the vegetables inside. This is really helpful for those who live in areas with hotter summer temperatures.
Use the structure to trellis tomatoes
Many commercial farms, conventional and organic, grow their tomatoes on trellises inside a greenhouse. This is for two reasons: One, because it creates a much longer season for this cash crop to be grown, harvested, and sold, and: Two, because it’s actually very easy to use the greenhouse itself to support a trellis for each plant!
Here’s how it works:
First, attach a length of strong twine to the ceiling of the greenhouse above a garden bed. Depending on the kind of greenhouse you have, this may be as simple as tying one end to a metal bar or tension wires, or you may need to install a hook or metal eye in a wooden rafter or support beam. The twine needs to be long enough to reach the soil with about eight inches left over.
Next, plant your tomato seedling right where the twine touches the soil.
Then, use the end of the twine to tie a loop around the base of the stem. Make sure it is loose!
As the tomato plant grows up, gently rotate the twine around the plant so that it spirals up the stem and catches under the branches.
This type of trellising is low effort and results in higher yields, because it lets more sunlight reach more of the tomato fruit, as well as increases airflow to reduce powdery mildew and other diseases.
Conclusion
Greenhouses are a great addition to backyard gardens because they make it easy to grow more of your own food in the colder spring, fall, and winter months.
It’s a fun challenge no matter how big or small your greenhouse is, and with the tips from this article, you’ll be able to boost your greenhouse’s productivity and lengthen your season with no problem!

